


Here what the bathroom looked like before we moved in


Here's what we did:
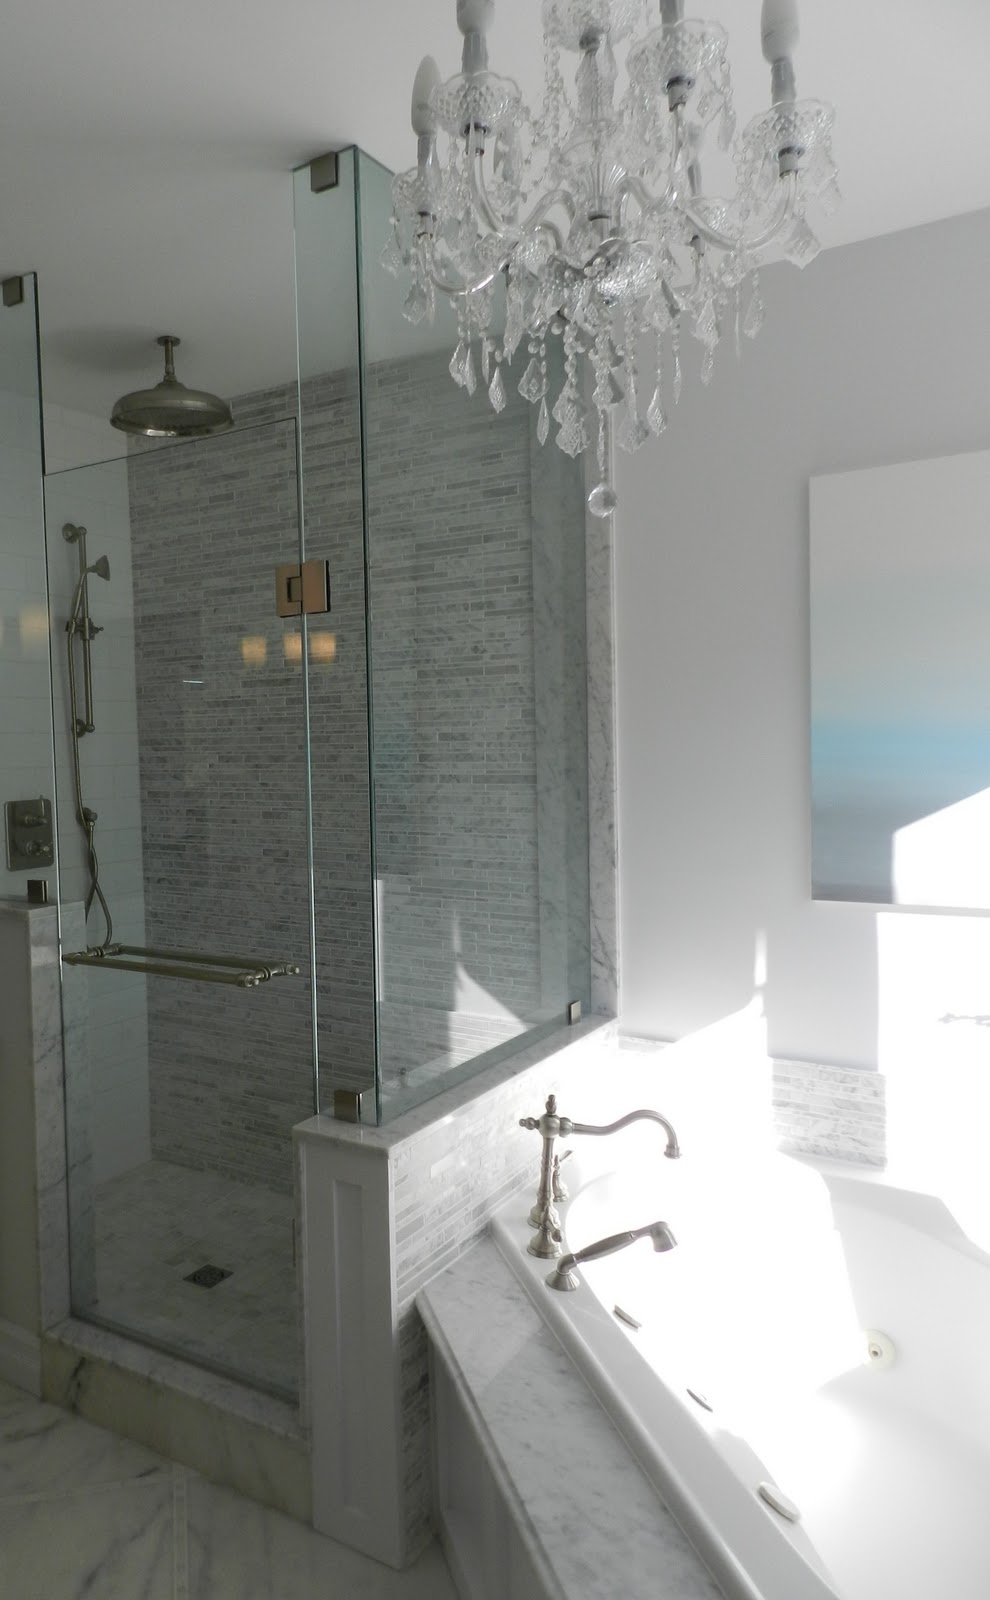
Floor
It is heated, which is a nice treat on a cold Canadian morning! Tiles on the floor were replaced with large marble squares with smaller marble squares between. The tile guy was not happy about how complicated this would be and actually really messed up the first time and it was awful. Our contractor was amazing and made the tile guy pay to have it replaced. The reno therefore lasted longer than expected, but the results were perfect the second time around. The tiles are from The Tile Shoppe.

Tub
We considered a free standing tub but because of the location and angle we couldn't find one that would work and look good so we kept the one we had. We had our carpenter add a shaker paneling detail around the front of the tub. A solid marble surface was used to surround the tub. A marble mosaic was added for the backsplash (same marble as shower). We had the plumber add plumbing to have a hand held sprayer (makes cleaning the tub so much easier). The tiles are from The Tile Shoppe, the faucet fixtures are from Taps Bath Centre. The painting I made myself.

Toilet
Was replaced with a more traditional looking toilet from Taps Bath Centre.
Shower
The walls came down, yeah! and replaced with glass. The mildewy tiles were removed as well as all the old drywall. A Schluter Shower System was installed to avoid any future water damage. We used both white ceramic subway tile as well as marble mosaic. The original reason was to save on cost by only using the marble on the wall you see walking in to have the greatest impact. Once it was installed I was glad we had shinny white tiles to help brighten and lighten the space. 2"x2" marble tiles were used on the floor, the size allowed the floor to have a slope to the drain. We managed to get in a shelf/cubby so that the shampoo bottles could be tucked away, somewhat hidden and off the floor. There was a point when it wasn't going to be possible, but we worked around the issues and got it in, and I'm so glad! The tiles are from The Tile Shoppe, the faucet fixtures are from Taps Bath Centre.

Vanity
We kept the existing vanity and replaced the counter top with marble and added a new faucet. We thought about double sinks for one second until we realized that would be an extra sink we'd have to clean! The mirror was replaced with one that goes from the backsplash uo to the ceiling. Two wall sconces (reused from another project) were used, which we like the look of a lot more then the overhead 3 bulbs. The wall scones might be replaced at some point with something a little more traditional, but these will work for now! The faucet fixtures are from Taps Bath Centre, sconces are from Restoration Hardware.
Missing: thing 4-6" white trim around the mirror to frame it out.
Missing: new vanity doors made in a shaker style and painted to match the paneling around the tub. I also have glass knobs from Restoration Hardware to put on the new doors.
What you can't see:

 A couple years before while doing a minor renovation to the Master Bedroom we removed a closet from the bedroom to give more space to the bathroom. In that space we've put this old medical cabinet from the condo. I haven't put a photo of that area finished yet because I still have to style it up!


this is beautiful! how much did this reno cost you? jacqueline.smojver@gmail.com
ReplyDelete